


 FREE SHIPPING £75+
 CELEBRATING 50+ YEARS
 PRICE MATCH GUARANTEE
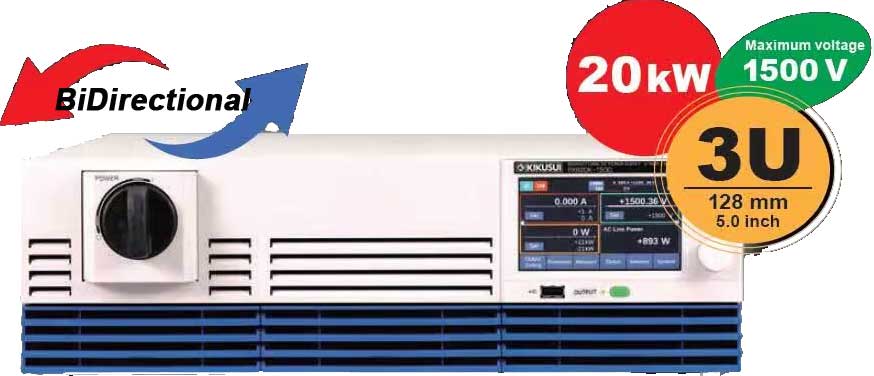
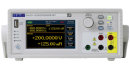
DP700 series power supply provides the following options:
Trigger: provides the trigger input and output functions.
Timer: outputs based on the preset voltage and current values.
High Resolution: improves the resolution of the instrument.
To install an option, you need an option license (each instrument has a unique license). The option license is a 28-character string, which consists of English letters and numbers. After you purchase an option, you will obtain a key (used for obtaining the option license). You can then install the option using the following steps.
(1) At the bottom of https://www.rigolna.com/ look for the license activation link:
https://licenseen.rigol.com/CustomerService/ProductRight_EN
(2) In the interface, enter the correct key, serial number and verification code. Then click Generate to obtain the option license.
Note: The hyphens in the option license should be omitted.
(3) Press the System key and press Option at the far upper right of the display. Then press the Up/Down arrow key to select the option to be installed.
(4) Press the OK key to enter the license input screen:
(5) In the License Input interface, press the Up/Down/Left/Right arrow key or use the knob to select the desired character (the English letter is not case-sensitive) on the virtual keypad, and then press OK to enter the character. The entered characters will be displayed in the “License Input Area”. While entering the characters.
Note: The hyphens in the option license should be omitted.
(6) After inputting a license, select “Save” on the virtual keypad and press OK. If the option has been successfully installed, a prompt message will be displayed.
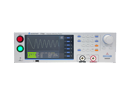
The DP832 is a triple output power supply. CH1 and CH2 are +30V supplies, and CH3 is a 5V supply.
To configure the instrument as a +/-30V or lower, you can use the instrument ground plug located on the front panel:

– Select which channel you want to be + and which you want to be – (in this note, we will select CH1 as -, CH2 as +)
NOTE: The jumper wires connected to the DP832 ground must use wire rated for 9A or greater to prevent damage or a possible fire hazard.
– Connect the power supply up as follows (we are including CH3 here)

– Configure the channels for the proper voltage, current, and limits that they require.
NOTE: CH1 true polarity will be negative (-) with respect to the DP832 Ground Connection, even though the programmed voltage will indicate positive (+)
– Enable the power supply outputs by pressing the ON/Off buttons for each channel
– To make operation easier, you can also activate Tracking between Channel 1
and Channel two by pressing Utility > System > Track Set > Set Track to
“Synchronous”. This will allow you to adjust the output value for Channel 1
and Channel 2 will follow.
For floating connections (without earth ground)
– Select which channel you want to be + and which you want to be
– (in this note, we will select CH1 as -, CH2 as +)
Connect the power supply up as follows (we are including CH3 here)


NOTE: The jumper wires connecting CH1 +, CH2 –, and CH3 – must use wire rated for 9A or greater to prevent damage or a possible fire hazard.
Configure the channels for the proper voltage, current, and limits that they require.
NOTE: CH1 true polarity will be negative (-) with respect to the DP832 Ground Connection, even though the programmed voltage will indicate positive (+)
– Enable the power supply outputs by pressing the ON/Off buttons for each channel
– To make operation easier, you can also activate Tracking between Channel 1 and Channel two by pressing Utility > System > Track Set > Set Track to “Synchronous”. This will allow you to adjust the output value for Channel 1 and Channel 2 will follow.
To configure the instrument as a +/-30V or lower, you can use the instrument ground plug located on the front panel:
– Select which channel you want to be + and which you want to be – (in this note, we will select CH1 as -, CH2 as +)
NOTE: The jumper wires connected to the DP832 ground must use wire rated for 9A or greater to prevent damage or a possible fire hazard.
– Connect the power supply up as follows (we are including CH3 here)
– Configure the channels for the proper voltage, current, and limits that they require.
NOTE: CH1 true polarity will be negative (-) with respect to the DP832 Ground Connection, even though the programmed voltage will indicate positive (+)
– Enable the power supply outputs by pressing the ON/Off buttons for each channel
– To make operation easier, you can also activate Tracking between Channel 1
and Channel two by pressing Utility > System > Track Set > Set Track to
“Synchronous”. This will allow you to adjust the output value for Channel 1
and Channel 2 will follow.
For floating connections (without earth ground)
– Select which channel you want to be + and which you want to be
– (in this note, we will select CH1 as -, CH2 as +)
Connect the power supply up as follows (we are including CH3 here)
NOTE: The jumper wires connecting CH1 +, CH2 –, and CH3 – must use wire rated for 9A or greater to prevent damage or a possible fire hazard.
Configure the channels for the proper voltage, current, and limits that they require.
NOTE: CH1 true polarity will be negative (-) with respect to the DP832 Ground Connection, even though the programmed voltage will indicate positive (+)
– Enable the power supply outputs by pressing the ON/Off buttons for each channel
– To make operation easier, you can also activate Tracking between Channel 1 and Channel two by pressing Utility > System > Track Set > Set Track to “Synchronous”. This will allow you to adjust the output value for Channel 1 and Channel 2 will follow.